Showing posts with label DIY. Show all posts

March 28, 2012

Lowe's Creative Ideas is Creative Marketing

Wooden Floor Mat

I gotta hand it to Lowe's.  Their marketing / advertising team made a smart call by appealing to woman-centered DIY projects in this pinterest-dominated era.  And in my opinion, this puts them at a different level than the other big box store.

It's springtime, and I'm dreaming about having some time to work on my garden & patio.  But since that's just a dream for now, I thought I'd at least post some of the fun garden & patio themed projects featured on Lowe's Creative Ideas site.

Herb Crate

Vertical Garden Planters & Rack

Freestanding Trellis

Tall Birdhouse Trio

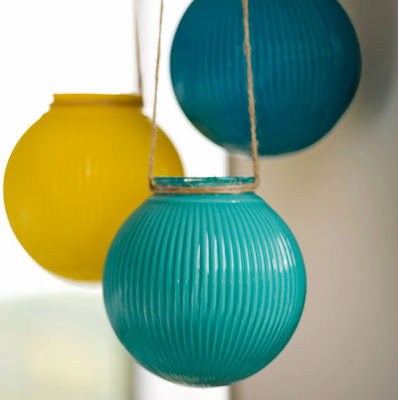
Hanging Globe Lanterns

Dog Bone Window

All of these projects, and more, can be found at Lowe's Creative Ideas website.  And no, I'm not sponsored by Lowe's in any way.  I just think it's a really really smart marketing concept, and I'm impressed.

January 30, 2012

DIY Sunburst Mirrors


My talented friend Rebecca (whose nursery you've seen before here) has been busy at work on her Living Room redo.  (Hopefully I'll get to post the whole room before & after once the finishing touches are done.)  Part of this redo includes an incredible sunburst mirror that SHE MADE HERSELF using wood shims!   She said she was inspired by a project she had seen online, so after seeing her mirror, I wanted to see what others had done.  It looks amazing, and cost far less than what you would spend if buying a mirror of that size from any retail store.

Here's how Rebecca did it:

Materials:
  • 12" cedar shims
  • Hot glue gun
  • 12" wood wreath frame (from Michael's)
  • Larger diameter wood frame (cut by her husband) for extra stability
  • Low-gloss tongue oil
  • Foam brush
  • 14" round mirror (from Michael's)
  • Mirror mastic
  • heavy-duty hanging bracket

  1. Glue the shims together with hot glue, in sections of 6, with the ends staggered.
  2. Glue the sections together to form a full circle (again using hot glue).
  3. Glue the 12" wood wreath frame to the back of the shim frame, using wood glue (with dabs of hot glue to help hold it in place while the wood glue dries).
  4. Do the same with the larger wood frame.
  5. Allow to dry (she put a lot of weight on it and let it sit flat for 24 hours).
  6. Once dry, apply 2 coats of low-gloss tongue oil with a foam brush (she didn't do any sanding between coats) to bring out the natural wood tones of the cedar.
  7. After the tongue oil is dry, attach the mirror to the front side of the shim frame, using mirror mastic.  (Use a lot of mirror mastic, since the shims are not even, and therefore you want to make sure there's enough mastic to fill any gaps so it still touches the surface of the mirror in as many places as possible.)
  8. Again, sit flat, add weight, and allow to dry (suggested 24 hours).
  9. Mount the hanging bracket on the back, and hang it on the wall.  


There are several other versions of DIY sunburst mirrors online, using wood shims, paint stir sticks, kindling, and even an old wine barrel.  Each photo has a link below to the instructions for each mirror shown.


from jandjhome


December 22, 2011

Holiday Gift: Homemade Kahlua


This year some of my colleagues / clients are getting homemade kahlua for the holidays.  I freely admit that I stole this entire idea from my wonderful friend Jen, who has given us this treat for the last couple years.

I found several recipes online, and I was surprised that each recipe was unique.  Measurements and ingredients varied a lot.  Some used brown sugar, while others used white sugar.  Some used just vodka, while others used vodka and brandy or just everclear.  Some used vanilla beans, and others used vanilla extract.  Many used instant coffee, but I preferred to use good quality brewed coffee.  I started narrowing down the recipes to just those with brewed coffee, and I ended up mixing a few of these, along with Jen's advice, to come up with my own.


Here's my recipe:
(Makes ±7 Liters)

  • 24 cups brewed coffee, using freshly ground espresso beans roasted locally by Rimini.
  • 1 - 5-lb. bag of sugar (approx 10 cups)
  • 1 - 1.75 L bottle of Skyy Vodka
  • 1 - 750mL bottle of E&J Brandy
  • 8 Tbsp. pure vanilla extract

Brew coffee.  Add sugar & stir until it dissolves.  Allow to cool to room temperature.  Add vodka, brandy, and vanilla.  Bottle, label, and if possible allow it to sit for at least 2 weeks in a cool dark place.  (I didn't plan ahead enough, so unfortunately the recipients are being advised to wait a bit before opening.)

For my bottles, I used these SLOM bottles from Ikea.  And for the labels, I downloaded a template from Avery for their 2"x4" shipping labels (#5263), and I created my own using this fun (and free) pattern from Sprik Space as the background.


Have you all made your own kahlua before?  What's your experience, and what recipe have you used?  I'd love to hear about it!


June 3, 2011

More Backyard Progress - We Have Grass!

Slowly but surely our backyard is starting to look like a backyard.  There's still a LOT of work to do, thanks to the cold and rainy weather that has kept me from working on it much.  But at least we now have grass.  AND sprinklers.

When we bought the house, our backyard was covered in asphalt, which we attacked with a jackhammer.


Then last summer we built a cool planter box / retaining wall, with the intention of getting sod shortly after that. 

Well, the sod never happened last year.  And I got really tired of all the pawprints around the house due to the dogs running around in dirt & mud all day.  So this Spring the lawn took priority!  

In order to keep a nice lawn looking nice, it needs to be watered.  And since we are both terrible at remembering to turn the sprinkler off or on, we figured an automatic system was critical.  So that came first:


Tearing up the yard for the sprinkler system made it look worse than ever!

The sprinkler system was finally in place (I think every Lowe's employee now knows who I am because of all the trips back & forth), and it was time to order the sod.  After an exhausting day of blood, sweat, and tears, and with a lot of help (thanks Flo!), we now have green grass.  

AND we have a means of keeping the grass green with our new sprinklers!


Whew!  I can't imagine doing all of this in a normal size yard.  Our tiny yard is enough for me to handle!

Next step:  Planting the veggies and getting the patio ready for summer.

May 19, 2011

DIY Kitchen Cosmetic Makeovers on Apartment Therapy


I'm sorry for my absence lately, but the good news is I'm BUSY!  Aside from the seminar I gave last week, and the 4 great new clients I recently picked up, I'm also helping my wonderful aunt & uncle with their new home in Michigan, as well as attempting to conquer my bare backyard, training for a century road bike ride, AND planning a wedding!  Whew!  But the seminar is over, and though I'm busy playing catch-up, I am going to be back to blogging... soon.  I'm not back 100% yet though, so this is sort of a cop-out post.  I'm actually just re-posting a great post from Apartment Therapy.

Apartment Therapy just featured 10 Before & After kitchen makeover projects that are perfect inspiration for you DIY folks out there.  If you aren't at a point where you can completely remodel or reconfigure your kitchen, a cosmetic facelift will often buy you some time.

My favorites of those featured are the kitchen shown above, and this one:


After

If any of you ever try a DIY makeover like these, please share photos with me!   I'd love to see what you do!

April 12, 2011

More Free Downloadable Artwork


I've been seeing a lot of symmetrical geometric prints framed and hung in groups.  People are especially loving this set of 6 from Crate & Barrel:

Others find that $ 369 is just too much to spend right now, and have been going about getting a similar look in more creative ways, such as framing 60-cent pieces of colored craft paper in Ikea frames:


But I just discovered Sprik Space, where the wonderful Aimee offers free downloads of geometric patterns in several different colors.  


The patterns she offers include Circles, Leaves, Grid, Chevron, Diamonds, Houndstooth, and more.

She then recommends getting them printed on 12"x12" size from Costco for $ 2.99 each, and framing them in Ikea Ribba square frames at $ 17.99 each.   If you follow these instructions, a set of 6 costs only $ 125.88!

She also offers other great downloads in various color options, great for nurseries, gallery walls, craft rooms, etc.  Just a few examples below:


See more at Sprik Space, under the Freebies tab!

See an earlier post for more downloadable artwork from Feed Your Soul.

April 7, 2011

Bathroom DIY Cosmetic Makeover Advice


My sister and brother-in-law recently bought a house and are planning on how to makeover the bathroom on a very tight budget.  With some creative thinking and a bit of physical labor, I know they can do it.  I thought I might share the advice I gave her, as it could be useful to others out there as well.

Based on the photo above, here is what I recommended:

  • The most obvious:  Remove the wallpaper borders, and paint EVERYTHING!  Paint the walls, trim, cabinets, and interior doors.  This will take the most time, but will make the biggest difference, and it won't cost much at all.
  • The countertop and sink are pretty neutral so those can stay without turning into an eyesore.
  • Remove the posts sitting on the knee wall between the vanity & toilet.
  • Get rid of the curtains!
  • Instead of boring blinds, make a fun DIY roller shade like this one by Emily A. Clark.   It would look great to have a fun fabric there since that window is such a focal point.  You can find great fabric prices online.  I've recently discovered Tonic Living for great modern fabrics at amazing prices.
via Emily A. Clark

Wouldn't this damask fabric look great?  AND it's on sale for only $ 8.95/yard!

  • Replace the carpeting.  I suggest a simple inexpensive tile.  This will involve the most physical labor but will be the most durable in the end.  If you don't want to mess with tile and grout, a shorter-term solution is a vinyl peel & stick floor, which will probably still be more durable than carpeting.
  • Since you'll want to pull the base trim up to redo the floor, I'd suggest looking into a taller base trim made from paint-grade MDF, which is a great price point and will work well in a high-moisture area.
  • Add flair with a fun framed mirror.  Take a look at places like Big Lots, TJ Maxx, Marshall's, etc. for mirrors.  You can find some great deals there.  Or even local thrift shops.  Keep in mind - if the frame is ugly you can always spray paint it a really cool color.

  • Replace the cabinet hardware.   New knobs will add a little punch to the final project.  You can find simple pieces for just a couple dollars.   Or you can splurge and get something unique for just a little more cost.   I've been drooling over this toggle pull from Paris Apartment for a while now:


Obviously these are only cosmetic changes, but considering nothing is broken and nothing is leaking, a makeover is all this bathroom really needs.  All of this won't cost a fortune, but it will make a HUGE difference.

March 1, 2011

Pillow Project

image via Freshly Picked

We finally bought the sofa we've been drooling over for a few months now.  But I'm going to keep you all in suspense for a while before posting any photos, because first I need throw pillows and lighting and I REALLY need to finish the gallery wall I've been planning forever.

When it comes to throw pillows, I really should just accept the fact that my dog will eat them.  But I must have them.  So I've decided I will sew the covers myself and use Ikea pillow inserts.  I can do this pretty inexpensively, which means I won't cry too hard when I discover the shredded remains buried in the back yard.

And since I'm still not great when it comes to sewing, I was thrilled to discover an envelope back pillow tutorial by Susan on Freshly Picked that describes these pillows as "the easiest thing that you've ever made."  Right up my alley!

Anyone else want to try making these pillows with me?  It would be fun to compare notes!

February 23, 2011

Rust-Oleum Transformations: Another DIY option

Recently, Rust-Oleum flew 10 design bloggers to New Orleans for a hands-on workshop to introduce their new line called Transformations.   I read about it on Apartment Therapy.

Cabinet Transformations
I've talked about painting cabinets before.  But now achieving the look of stained & glazed wood doesn't seem so impossible for an amateur DIY homeowner.  The Cabinet Transformations kit comes in 70 different colors.  The website claims "no stripping, no sanding, no priming" (although in the FAQ section they do recommend a Zinsser Primer if using raw wood).  They claim it works on all wood, melamine, and laminate surfaces.


Here's a before & after cabinet photo from their website:


Countertop Transformations:


This is a simple (yet messy) kit that covers existing laminate countertops (also claims to work on wood or metal trim) using 3 layers:  1)  Adhesive base coat, 2) Decorative Color Chips, and 3)  Protective Coating.

It is currently only available in these colors:


Here's a before/after countertop photo from their website:


I haven't used this product, and only know info from the bloggers' opinions and from Rust-Oleum's website.
But it sounds like a great product and I'd be willing to try it (maybe it's finally time to do something with the honey oak that I despise so much in my kitchen and bathroom?)  I sure wish Rust-Oleum would use me as a guinea pig with their product...


January 18, 2011

Free Printable 2011 Calendar

Is anyone else out there suddenly feeling disorganized because they don't have a 2011 calendar yet?  I am!  And calendars are expensive, especially because you use them for a year and then they're worthless (unless the calendar photos are good enough to cut out and frame, which is actually an inexpensive way to get 12 new pieces of artwork).

Last year I discovered Blue Dot's free downloadable / printable calendar.  They've created a 2011 calendar this year and I love it even more.  Check it out!

Here are a few of my favorite months: